VirtualBox is a powerful x86 and AMD64/Intel64 virtualization software(VBox for short), which can be used to construct kinds of debug or test network environments, to capture or analyse the packets in the test network. Sometimes, for the sake of security, some virtual hosts run parallely on the same physical platform to isolate each other, decrease complexity. Sometimes, Vbox is used as hack tools to hide from tracking. All these usages are based on the network configuration of Vbox itself. This article is about the network configurations and the topology of each configuration. As usual, we start talking about network from the Physical layer.
Network Adapter
VBox provide 8 PCI network adapter for each client, only 4 of them can be configured with GUI, and all 8 adapters can be configured through command line interface.
Optional categaries:
1 | AMD PCNet PCI II(Am79C970A) |
Remark, all the client OS must contain the specific driver for the specific adapter.(Most of modern OS have the drivers.)
Network Types
VBox provides us 7 options to fullfill kinds of requirements.
Option 1: Not attached
With ‘Not attached’, the client machine runs as a standalone computer that has a network adapter without network cable plugging in.
Option 2: Network Address Translation(NAT)
‘NAT’ is a default option when VBox is installed. VBox provides a NAT router and DHCP service for every client os. 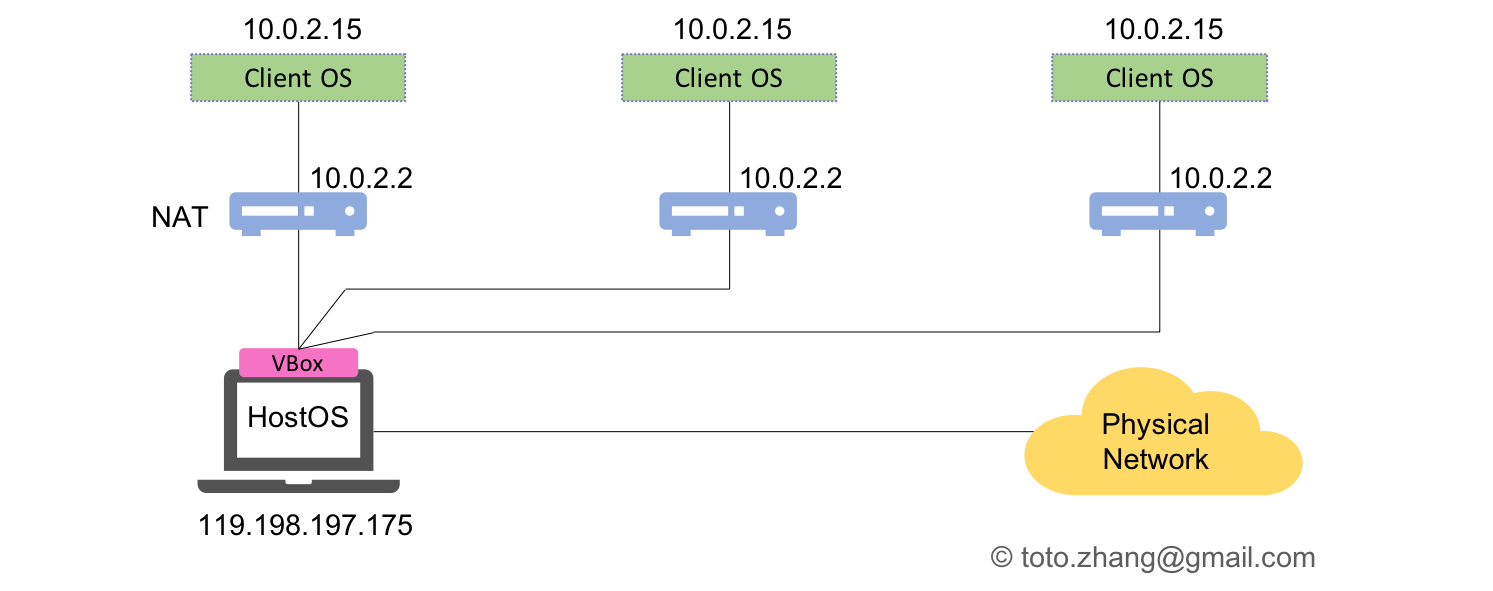
E.g. we config 3 client os at the same time, the 10.0.2.15 is assigned to all the 3 client os, the default gateway IP address is 10.0.2.2. The default segment is 10.0.2.0/24. Of course, the default information can be changed with the command:
1 | vboxmanage modifyvm <vmname> --natnet1 "192.168/16" |
If the host os can access the Internet,so does the client os. From the physical network point of view, all of the packets which actually come from the different client os, are all from the Vbox process. At the same time, it’s also show us that the NAT network can be recursive. Now, if any user from the physical network need to access any of the client os in VBox, port forwarding setting should be considered.
Option 3: NAT Network
In this mode, all of the clients on VBox share the same NAT router. It’s just like the wifi router used at home. And we must create a NAT network manually before using it. (Virtual Box > Preferences > Network > Create) 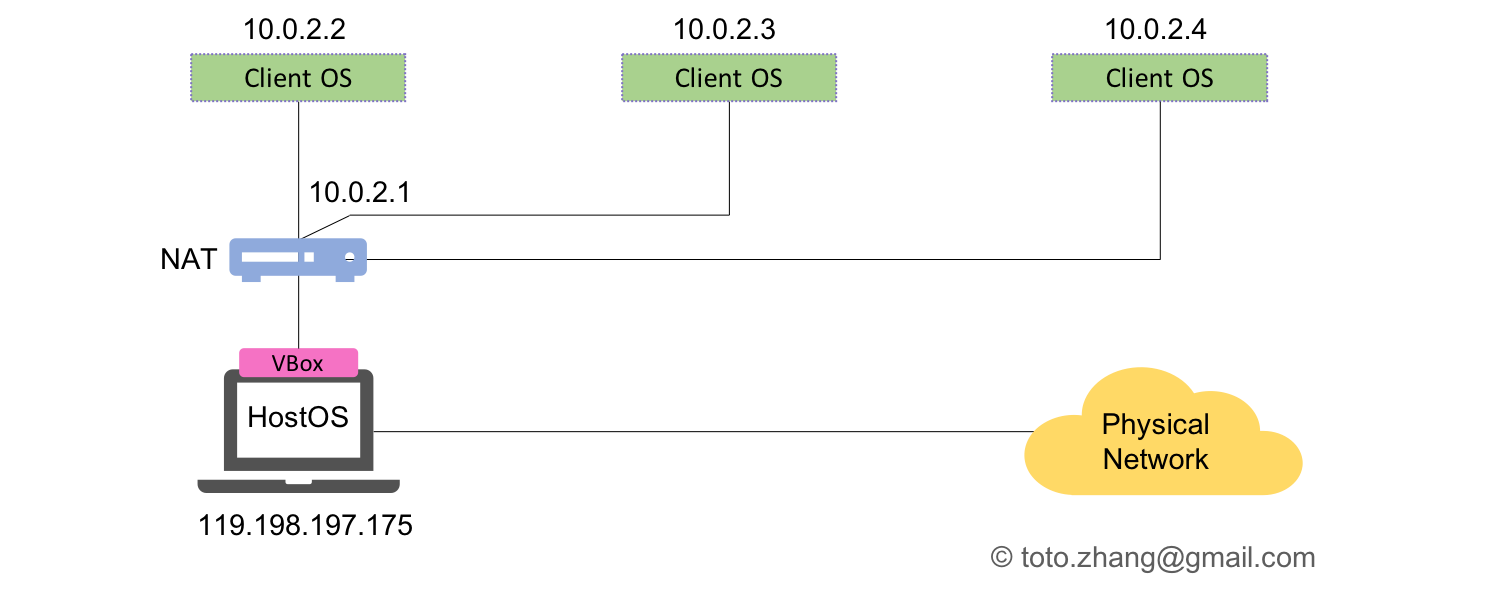
The key difference between NAT Network and NAT option is that, in the NAT Network, clients share the same router and gateway.
Option 4: Bridged Networking
In this mode, client and host machine are bridged in the same ethernet segment. In other words, the clients are connected to the physical network directly. If there’s a DHCP server, the clients get IP addresses automatically. Theoretically, in the bridged mode, either the clients or the VBox itself can provide the DHCP service for the network, and it highly possible result unpredictable conflicts. It’s not recommended to do this. 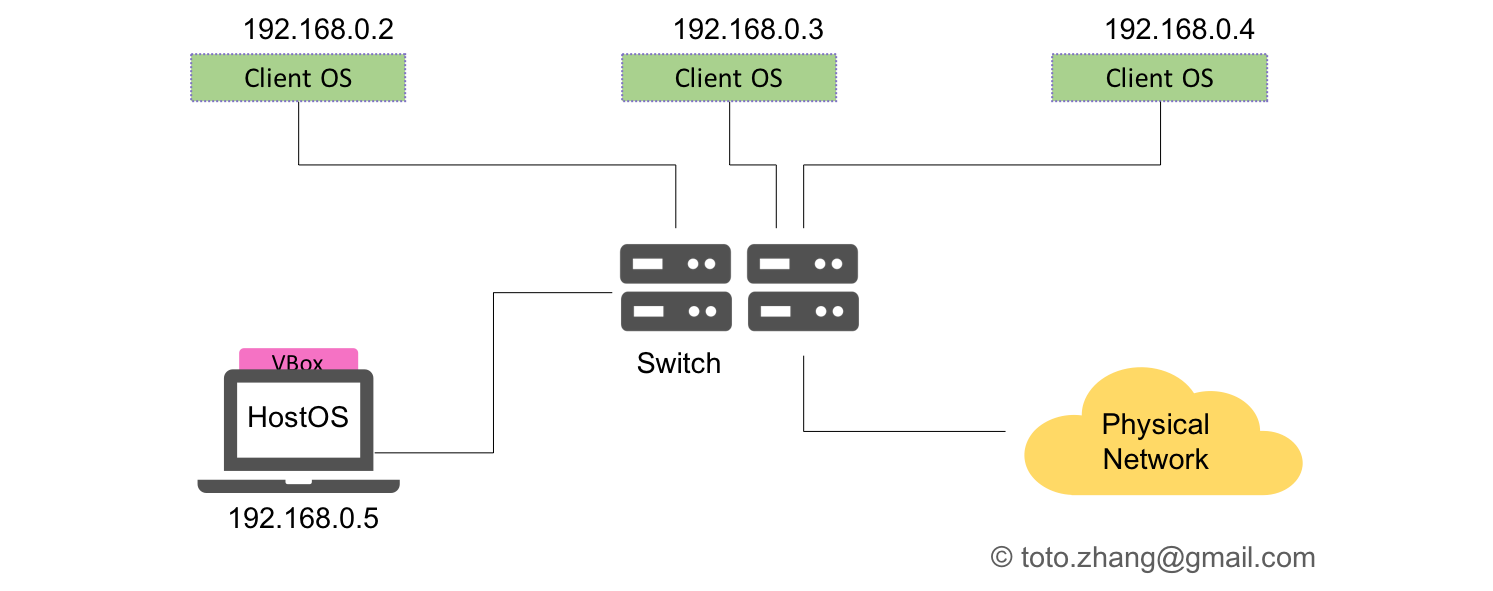
If the host is multihomed, the network interface should be indicated specifically.
1 | #The bridge interface printout |
If the client can not get a proper ip address from DHCP server, run this on client Linux.
1 | dhclient eth0 -v |
Notice that this mode is only effective when the data-link layer is ethernet network including the cabled or the wireless.
Option 5: Internal Networking
In the process of developing a network application, it’s inevitable to capture the network data packets for debuging or test. Most of the time, engineers prefer the bridged mode. Sometimes it’s more useful to choose the internal network mode. For instance, if the packets will impact the physical network, we should prevent this kind of situation in product environment, or, if we need excluding the unnecessory interference packets, to simplify the analysing process. Sometimes maybe we also need an extra internal network like the topology for the nodes to communication with each other with heatbeat packets. 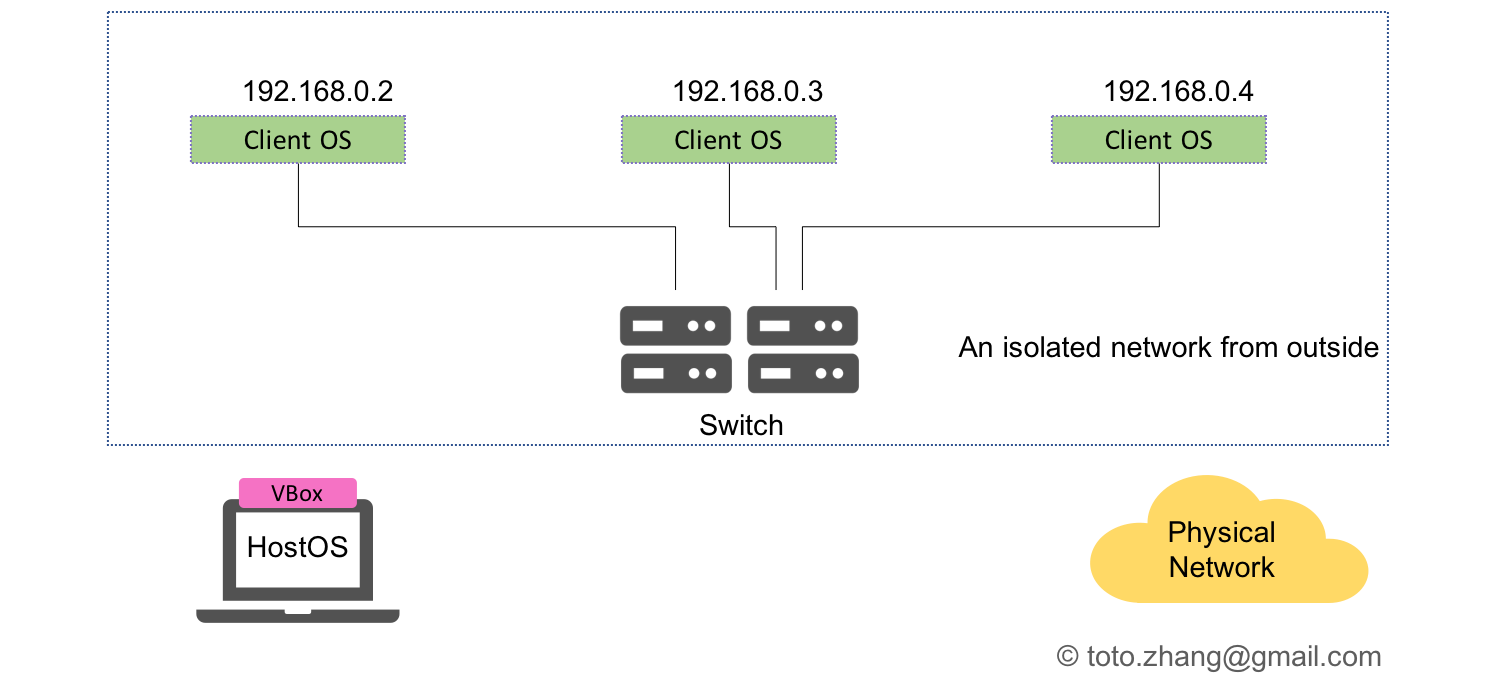
VBox CAN provide DHCP service in this mode, here is the configuration procedure:
1 | # Check the Internal Network |
DHCP service can be configed on one of the client. Static IP address can also be assigned to client directly. Please notice that, under UNIX like os, VBox should run with the same login user to construct a internal network.
Option 6: Host-only Networking
In this mode, it’s just like the internal mode, the only difference is that the host machine is added into the internal network. In this mode, it’s optional whether the VBox provides the DHCP service or not. 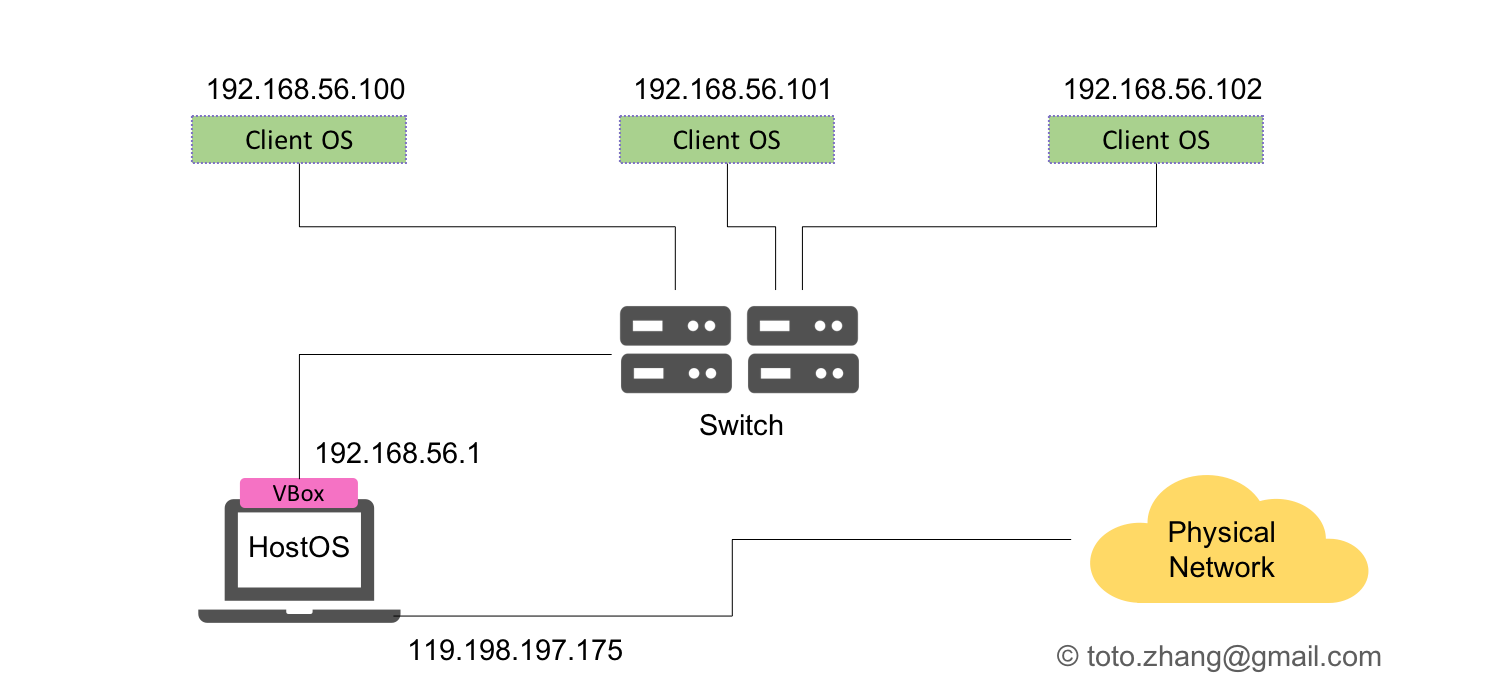
Configuration procedure:
1 | # Config the given nic x of a specific vmname to Host-only mode |
After DHCP Server start, sometimes, the client can’t get a proper IP address. It’s a bug of VBox (#4038). The remedy is to power off all the client machine, on the host machine, kill all the VBox processes, restart the VBox, power on all of the hosts again.
Option 7
A unusual used option, please refer the document for details.
The packets-capture-feature of VBox
When we need to capture the packets in the network constructed in VBox, tools like tcpdump or wireshark can be applied. VBox provide another option for packets capturing. Procedure:
1 | #Power off the clients |
The test environment referred in the artical.
1 | Host OS: ubuntu 14.04 LTS |